Teardown Inspection (22 Oct 2006)
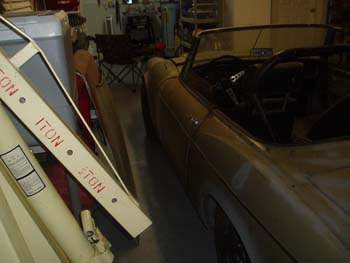
Since the car was purchased in 2004 it spent some time under a cover sitting in a car port. When it came time to move it into my garage the rotors had rusted tight and a rat, mouse, or squirrel (some little creature) had made a home in the car. The car was not uncovered for at least two years while I was in Korea and Iraq (I guess a quiet car makes a great home for a critter).
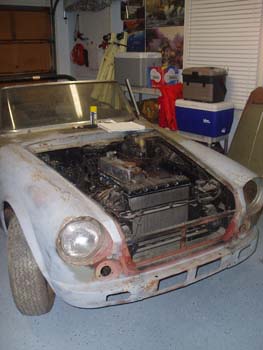
Old Engine (22 Oct 2006)
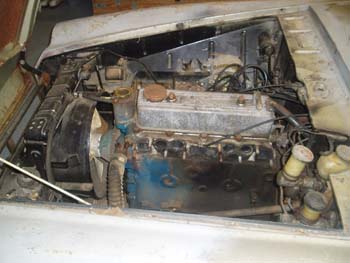
The old engine actually ran when I parked it (I know everyone says that), but I pulled the carbs awhile ago to use as cores for my purchase of 1600 carbs from ZTherapy for my 67 daily driver. During this visual inspection I noticed some dents around the "hood catch" which led me to believe the engine may have been pulled sometime during it's life (not to mention the engine paint color is not the correct blue)...the dents probably resulted from putting the drive train back in.
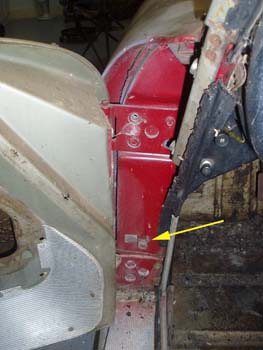
Nuts! (22 Oct 2006)
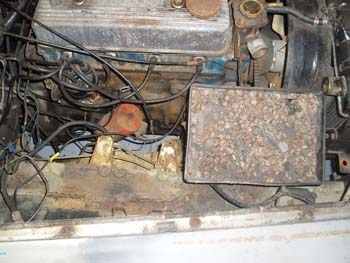
Well the little visitor who made my car their home used the battery tray as a diner dish. Looking around the car, this was one of the few rust thru areas I found (not uncommon under a battery).
Moving to the Inside (22 Oct 2006)
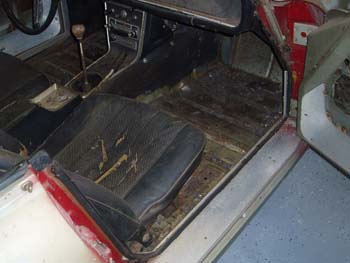
Looking around the interior I found no rusted out floor pans or problem areas. The floors look rough, but they're actually filled with pieces of the foam padding that was covering the roll bar and windshield frame top (an attempt to keep the cover from ripping), which didn't matter because the critter chewed that up as bedding. The car has certainly been painted a few colors.
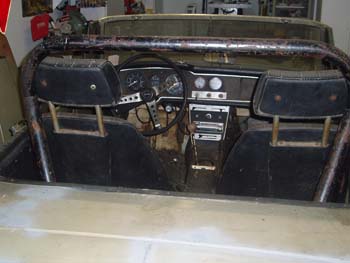
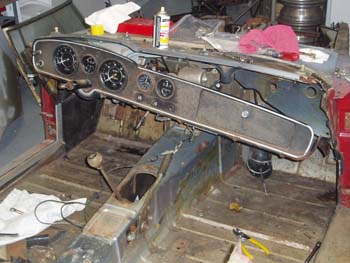
Interior Shot (22 Oct 2006)
The 67.5 was the last model that had the flat dash, later models moved to a more protective "padded dash". The 67.5 dash is recognizable by its black bezel combo gauges and three toggle switches in the center. I prefer the look of my 67's chrome bezel gauges, but I'm planning an overlay for this dash, so black gauges should look fine. The exposed metal on the headrest will have to be completely stripped and powder coated to protect it.
Door Stops (22 Oct 2006)
The door hinges seem fine on the car and both doors have their door stoppers (limiters). I dremeled the pin off to release the door stopper. After that you need to remove the inside kick panel and there is an access hole that allows you to unbolt and pull the stopper out. Many cars have lost this piece long ago, but it's designed to stop the door from opening too far and possibly bending at the fender lip.
Hood Removed (26 Oct 2006)
Today I started the actual disassembly. I removed the hood and drew as many details of the under hood components as possible. I bought various sizes of plastic and canvas bags to mark and store bolts and parts in as I disassemble the car.
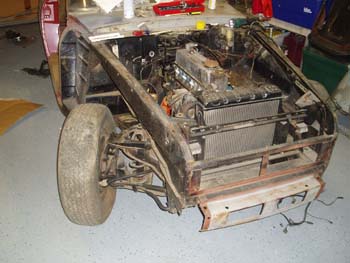
Doors and Fenders (26 Oct 2006)
I went ahead and removed the doors and both front fenders while I was motivated. I sprayed many of the bolts with a good shot of PB Blaster and let it sit while I worked on other sections. Both inner fenders looked good (except the battery area), but usually the lower parts of the front fenders and the front of the rocker panel they cover are notorious for being rusted thru. Speaking of the fenders the inside edge along the door frame contains padding that serves to "seal" debris being thrown by the wheels. (Read- rust magnet)
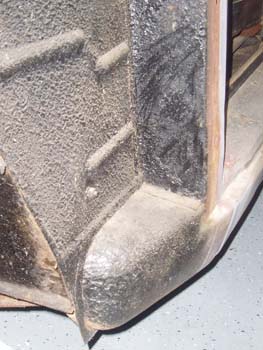
Rocker Panel (26 Oct 2006)
I was truly surprised by how solid the rockers and floor pans were in this car. On one the 66' I purchased in Columbus, GA I could have replicated Fred Flintstone by putting my feet thru the floor. This car seems to have really survived well. There is a great coat of undercoating, but I will probably remove it and verify nothing is hidden under it and then reapply undercoating to these areas.
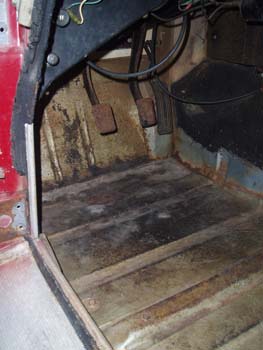
First Cleaning (28 Oct 2006)
While I was tearing the car apart I got real tired of working around the "pet pellets" and foam chunks, so I gave the car a once over with the shop vac. Now you can see the floor pans a little better and I should avoid breathing in more critter crap!
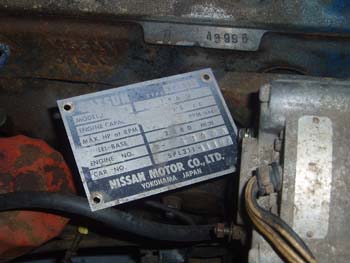
Numbers Match (28 Oct 2006)
While I was sucking junk out of the engine bay I decided to remove the VIN plate. The car is numbers matching from VIN to Engine #. This isn't that big of a deal to me and the 1600 won't be going back in anyways, but I'll need the VIN plate to have a reproduction made so at least my Title will still match.
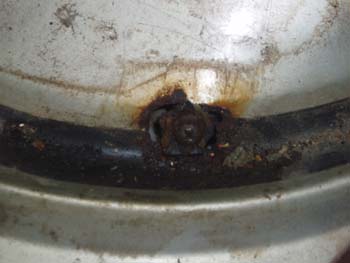
Rust Hole! (28 Oct 2006)
Today I removed the seats and started on the windshield and dash. The low windshield has bolts on the side rails, but is also bolted through the top of the dash. Taking the windshield out was easy for me since I wasn't saving my dash pad. This hole was found under the windshield frame, that area will need some TLC (the area at the top of the dash area is painted black as that area is visable thru the windshield and the dashpad doesn't extend to the windshield).
Dash Almost Out (29 Oct 2006)
The slowest part of the dash removal was marking all the hose and cable connection thru the firewall, and identifying wires and relays. The dash face bolts to the sides of the body and across the dash plate. You can still see the "twistys" on the dash since all I did was break off the old brittle foam.
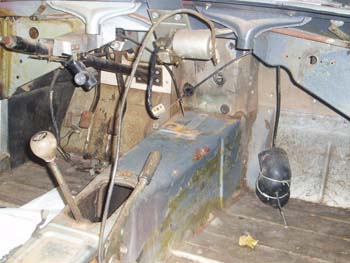
Dash Out! (29 Oct 2006)
Well the dash is completely out and I finished marking all of the connections. I will start on the steering column next as I will need it disconnected to lift the body from the frame. I'm still very impressed by how good the floorboards look. The Roadster came with a thick coating on the floor panels that I will need to remove when I start working on the body.